
Coloring Crafts
What to Do with Finished Coloring Pages: 12 Easy Craft Ideas
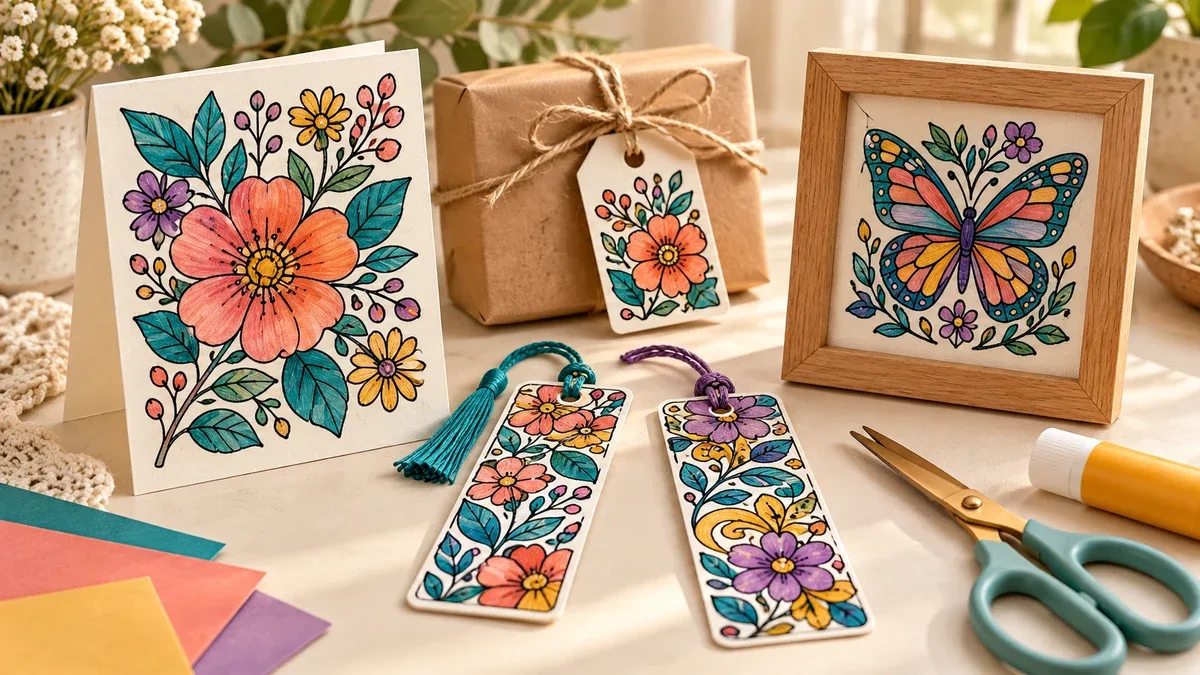
You colored a page, and it looks great. Now what? Do not toss it in a drawer. You can turn it into something useful, display it or keep it safe for years.
Quick answer: Turn finished coloring pages into bookmarks, greeting cards, gift tags or a small gallery. Pick a project that suits your paper, and decide whether you want to keep the original untouched before you cut or glue. Scan favorites and store originals flat in acid free folders.
This guide gives you twelve easy crafts, plus ideas for display, storage, scanning, mailing and copyright. Every craft includes a time and skill tag. Last reviewed: October 2026.
A page does not need to look perfect to make a good craft. Need more pages to color first? Visit the All Coloring Pages homepage.
In this guide
Decide what to keep first
Before you cut anything, decide what each page deserves. A quick sort saves clutter and protects the pages you love.
If the page is | Do this | Example |
|---|---|---|
A favorite you want to keep | Store or display it safely | Frame it or file it in a folder |
A strong picture with a clean border | Turn it into a card or gift | Greeting card |
A good detail on a messy page | Cut out the best part | Bookmark or tag |
A page you enjoyed but do not need | Photograph it, then recycle it | Photo book or digital folder |
A page that someone else would love | Share it | Mail it to a grandparent |
If the page belongs to a child, let the child decide whether to keep it or turn it into something else. A quick scribble can mean more than the picture an adult thinks looks neatest.
Quick idea chooser
Your page | Good project choices | Extra support |
|---|---|---|
A small favorite detail | Bookmark or gift tag | Backing card |
A strong central picture | Greeting card or framed display | Card blank or frame |
A colorful repeating pattern | Wrap band, envelope liner or bunting | Usually little extra support |
A page with mistakes or torn edges | Collage or notebook decoration | Sturdy base |
A scene with several characters | Puzzle or story cards | Cardboard or card |
Before you cut or glue
Photograph the page first, so you keep a record.
For a special original, use a copy for your experiment if the artwork’s terms allow copying.
Gather dry artwork, scissors, a ruler, a pencil, backing card and a paper safe adhesive.
Test your adhesive on an offcut. Moisture can move some coloring inks, and thick wax can block glue.
Let an adult handle tricky cutting.
Did you print the page at home? Then see our printing guide for sharper pages next time. Paper also changes how crafts turn out, so our paper guide helps too.
12 easy craft ideas
1. Make a bookmark
Time: 10 minutes. Skill: easy.
You need a colored section, backing card, scissors and glue or paper tape.
Use a paper window or a ruler to pick a narrow section of the artwork.
Cut a strip that fits comfortably inside your book. About 5 by 15 cm makes a good starting size.
Attach it to backing card, and trim the edges after the glue dries.
Keep the bookmark flat so it does not strain the book’s binding.
Skip bulky decorations if you plan to leave it in a closed book.
2. Create a greeting card
Time: 15 minutes. Skill: easy.
You need a folded card blank, a selected image, glue and a pen.
Choose a flower, animal or pattern that fits the front of the card.
Trim it slightly smaller than the card so the border frames the picture.
Attach the artwork to the front without covering the fold.
Write a personal message inside.
A small image on a generous plain background often looks clearer than a crowded full page. Check the envelope size before you add thick layers.
3. Cut personal gift tags
Time: 10 minutes. Skill: easy.
You need artwork scraps, card, scissors and a hole punch if you want a tie.
Cut a rectangle, circle or simple tag shape around a colorful detail.
Add a plain backing so you have space for the name.
Punch a hole with enough paper around it to resist tearing.
Attach the tag to the outside of the gift.
Use scraps from another project, so one finished sheet makes both a card and a matching tag.
4. Make a gift wrap band
Time: 10 minutes. Skill: easy.
You need a colored strip, a wrapped gift and paper tape.
Wrap the gift in plain paper first.
Cut a wide strip from a patterned coloring page.
Fit the strip around the package and join the ends at the back.
Add a matching tag if you like.
A band uses less artwork than wrapping the whole box, and it avoids bending a small sheet around big corners. Keep inked paper away from direct food contact.
5. Decorate a paper gift bag
Time: 15 minutes. Skill: easy.
You need a plain paper bag, a colored picture and glue.
Lay the empty bag flat.
Arrange a central image and a few smaller pieces on the front.
Attach them, and keep the side and bottom folds clear.
Let everything dry before you open and fill the bag.
Keep the decoration light. The bag and its handles must hold the gift, so the coloring page should only add style.
6. Add an envelope liner
Time: 20 minutes. Skill: medium.
You need an envelope, thin colored paper, a pencil, scissors and a glue stick.
Make a plain paper template that fits inside the envelope and below its sealing strip.
Test the template before you cut your artwork.
Trace it onto a suitable colored section and cut it out.
Insert the liner, fold it with the flap and secure the upper part lightly.
Use thin paper so the envelope still closes easily. Keep the sealing area free of glue and extra paper.
7. Build a rotating mini gallery
Time: 10 minutes. Skill: easy.
You need a frame or display holder that fits the sheet.
Choose a favorite complete page or a well composed crop.
Use a suitable mat or holder to support the artwork.
Place the display away from direct sun and splashes.
Swap the picture when you finish another favorite.
For an irreplaceable page, display a copy and store the original. Light damage builds up over time, and we explain how to limit it below.
8. Personalize a notebook cover
Time: 20 minutes. Skill: medium.
You need a plain notebook, artwork pieces and paper adhesive.
Arrange the pieces on the front before you glue anything.
Leave the spine and hinge area free so the cover opens normally.
Attach the pieces with a thin, even layer of adhesive.
Let the cover dry fully before you handle it often.
A central panel with a small border wears better than delicate pieces that hang over the edges. Test adhesion first if the notebook has a glossy coating.
9. Create a paper collage
Time: 30 minutes. Skill: easy.
You need several scraps, a sturdy base and glue.
Sort the scraps by color, shape or theme.
Try an arrangement without glue.
Move larger pieces into place first, then fill gaps with smaller pieces.
Attach the final arrangement to the base.
You can build a new landscape, a color mosaic or a big initial. This project works best when only parts of a page appeal to you.
10. Make a simple picture puzzle
Time: 25 minutes. Skill: medium.
You need a finished scene, thin cardboard, glue and scissors.
Attach the page evenly to cardboard.
Let the glue dry fully.
Draw a few simple cutting lines on the back.
Cut larger pieces for an easier puzzle, and store them together.
Take a photo before cutting so you have a reference picture. Choose piece sizes that suit the player, and avoid small loose pieces around children who still put objects in their mouths.
11. Create story cards
Time: 20 minutes. Skill: easy.
You need pictures of characters, places or objects, backing card and scissors.
Cut several images into cards of a similar size.
Mount thin paper on card if it needs support.
Shuffle the cards and choose a few.
Tell a story that includes every selected image.
Leave a blank area on the back for a character name or a story idea. Unlike a matching game, this activity does not need duplicate pictures.
12. Assemble decorative bunting
Time: 30 minutes. Skill: easy.
You need patterned paper, a simple flag template, string and paper tape.
Make one template so the flags share a consistent shape.
Cut the flags from sections you want to display.
Fold a small top tab over the string and tape it on the back.
Hang the decoration securely where nobody will catch or pull the string.
Keep strings out of young children’s reach and away from sleep spaces. Use a few coordinated colors if you want different pages to look like one set.
Display ideas that need no cutting
Frame a favorite page with a mat, so the artwork does not touch the glass.
Use a clip frame for a quick, changeable display.
Hang a string with clothespins for a rotating gallery.
Slide pages into sheet protectors in a binder for a personal art book.
Pin family pages to a corkboard in the hallway.
Light damages paper over time. The Library of Congress advises keeping artwork out of direct light, and it recommends acid free, lignin free mats and board for framing, plus UV filtering glazing. Rotate your display every few weeks, and keep original favorites away from sunny windows.
Store the pages you keep
Use a folder, box or portfolio that supports the page without folding it. The Library of Congress recommends acid free, lignin free folders and boxes, and it advises keeping paper in a cool, dry place away from light. Read its paper care guidance for details.
Store pages flat, in boxes big enough that nothing bends.
Keep them in a clean, dry, stable room, not a damp basement or hot attic.
Avoid rubber bands, pressure sensitive tape and rubber cement, because they can damage paper over time, according to the National Archives.
Separate marker pages from pencil pages if marker ink might transfer.
Label each folder with the date, the person and the tools used.
Should you laminate coloring pages?
Lamination keeps a page wipe clean, so it suits placemats and classroom pages that people will handle often. However, preservation experts advise against it for keepsakes. The University of Illinois preservation guide explains that lamination uses heat and adhesives, cannot be undone and can damage the item. It also says encapsulation is a reversible option for long term protection. So laminate pages you plan to use, and store special originals in suitable sleeves.
Scan and digitize your favorites
A scan lets you keep a page forever and share it easily. It also lets you print copies for crafts while the original stays safe.
Clean the scanner glass and flatten the page.
Scan at 300 to 400 dots per inch. The Library of Congress says this range is satisfactory for most personal work.
Save a master file as TIFF if you can, and make a JPEG copy for sharing.
Name each file clearly, such as name, topic and date.
Back up your files in three copies, on two types of storage, with one copy somewhere else.
Read the Library of Congress guide to scanning the basics for more detail. You can also turn scans into a photo book or a printed canvas.
Share, gift, mail or donate
Many people love receiving a hand colored page. Grandparents, teachers and neighbors make great recipients. For mail, slide the page into a stiff folder or between two pieces of card, and skip glitter and loose pieces.
You can also share cards or drawings with community groups, but policies change. Always check with an organization first to confirm that it still accepts artwork and to learn any rules. Hospitals, care homes and charities often have safety or privacy requirements.
Selling or gifting crafts made from downloaded pages
Check the license before you sell anything. The US Copyright Office explains that only the copyright owner can prepare a new version of a work, or authorize someone else to do so. So a craft made from another artist’s page may need permission. Read the US Copyright Office fair use FAQ for the basics. For gifts and personal use, you usually have more freedom, but the same license still applies. You can also read our terms and conditions for this site.
Solve glue and finishing problems
The paper wrinkles
Use less glue and spread it evenly. Thin paper can ripple when it absorbs moisture. Test a glue stick or paper tape on a spare piece, and follow the product’s drying instructions.
The color smears
Stop rubbing the surface. Let the test dry, then try a method that avoids coating the colored side. A frame, photo corners or glue on the back may suit the project better.
The artwork will not stick
Check for glossy coatings, thick wax or dust. Glue the plain back where possible, and choose an adhesive that works with both materials.
You want a wipeable finish
Read the finishing product’s instructions, and test a duplicate first. Heat, moisture and coatings can change artwork. Keep special originals out of experiments.
Keep coloring
Ready for your next page? Learn how to color with colored pencils, or compare crayons, colored pencils and markers. You can also browse the All Coloring Pages homepage for new pages.
How we wrote this guide
We reviewed the top ranking craft lists and added what they skip: a keep or craft decision guide, storage, lamination, scanning, mailing and copyright. We checked preservation and copyright advice against the Library of Congress, the National Archives, the University of Illinois and the US Copyright Office. Craft times are our estimates. Last reviewed in October 2026.
Common questions
What can I do with finished coloring pages?
Turn them into bookmarks, cards, gift tags, wrap bands or collages. You can also frame favorites, scan them or share them with family.
What should I do with my child’s coloring pages?
Let your child choose favorites. Display a few, store the best in a flat folder and photograph the rest.
How do I store coloring pages without damage?
Store them flat in acid free folders or boxes, in a cool, dry place away from light. Avoid rubber bands and tape.
Should I laminate every finished page?
No. Lamination suits pages people will handle often, but it cannot be undone and can damage keepsakes. Store special originals in suitable sleeves instead.
How do I display coloring pages without fading?
Keep them out of direct sun, use acid free mats and UV filtering glass, and rotate the display. Display a copy of irreplaceable pages.
How do I scan coloring pages?
Scan at 300 to 400 dots per inch, save a TIFF master and a JPEG copy, and keep three backup copies.
What can I do with unfinished pages?
Use the finished sections for tags, bookmarks or collage pieces. You do not need to color the entire design before you reuse a small part.
Can I mail or donate coloring pages?
Yes, often. Mail them flat with stiff backing. Before you donate, check with the organization, because rules vary.
Can I sell crafts made from downloaded coloring pages?
Only if the license allows it. Check the creator’s terms and get permission before you make products for sale.
Which project should I try first?
Start with a bookmark if you have a small colorful section, or a greeting card if you have one strong central image. Both use few materials, and you see a finished result quickly.