
Coloring Techniques
How to Color with Colored Pencils: A Beginner’s Guide
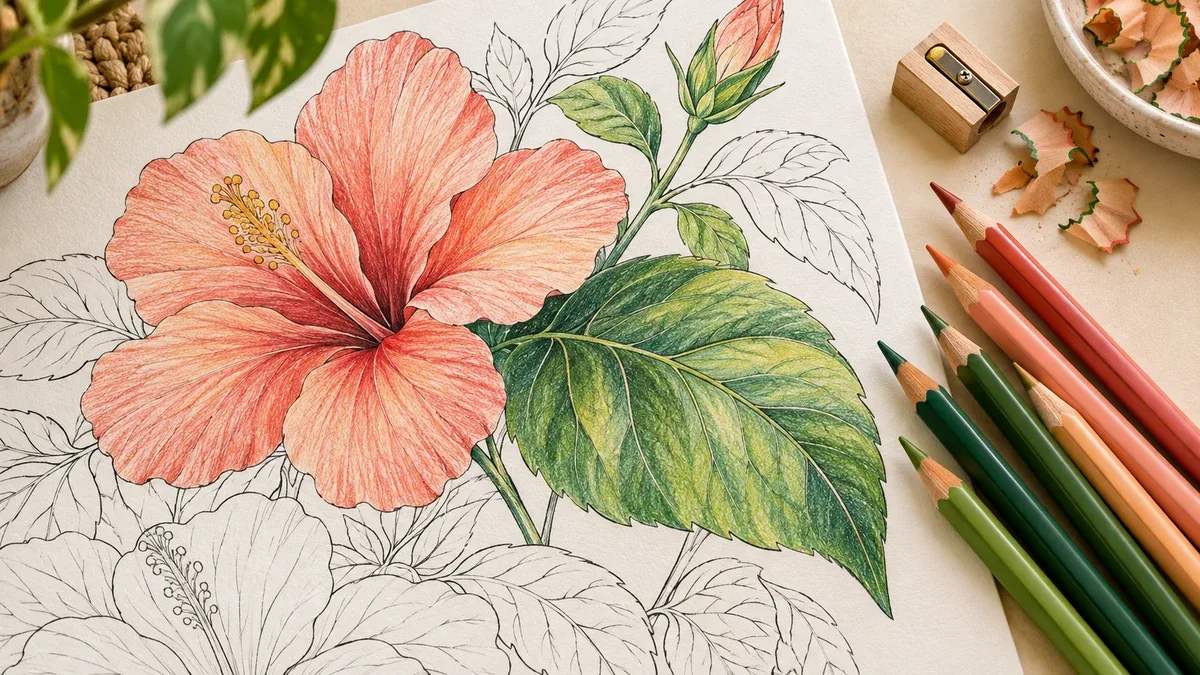
Colored pencils look simple, yet they can feel tricky at first. The good news is that a few easy habits fix most beginner problems.
Quick answer: Use light pressure, build several thin layers, work from light colors to dark colors and save your darkest accents and burnishing for last. A sharp point helps with details, and gentle overlapping strokes make large areas look even.
This guide covers supplies, paper, pressure, strokes, blending, a leaf exercise, a full page workflow and fixes for common problems. Last reviewed: October 2026.
You can learn all of this with pencils you already own. When you want pages to practice on, browse the All Coloring Pages homepage.
In this guide
What you need to start
You need less than you think. A small kit teaches the same skills as a huge one.
Item | Why it helps | Beginner option |
|---|---|---|
Colored pencils | They hold your colors | A set of 24 to 36 pencils |
Sharpener | A sharp point controls edges | A hand sharpener made for colored pencils |
Test sheet | It shows true colors before you commit | Any spare printer paper |
Kneaded eraser | It lifts light mistakes without rubbing | A small gray eraser |
Backing sheet | It protects your page from smudges | Clean scrap paper under your hand |
Soft brush | It clears crumbs without smearing | A clean paintbrush |
Thirty to fifty colors are plenty for most beginners. Pick a range of lights, mediums and darks in each color family, and you can mix the rest.
Wax based, oil based and watercolor pencils
Every colored pencil contains wax and oil, but the proportions change how it feels. Wax based pencils feel soft and creamy, blend easily and wear down quickly. Oil based pencils feel harder, hold a sharper point and layer in thin transparent coats. Watercolor pencils contain a water soluble binder, so a wet brush turns them into soft washes. For printed coloring pages, any of the three can work, but start with dry use.
Choose paper that grips color
Paper changes everything. Strathmore recommends vellum Bristol when you want more texture and tooth, and smooth Bristol when you want fine detail. Its 300 Series Bristol weighs 100 lb, or about 270 gsm, and it stands up to many layers. Read more in Strathmore’s guide to paper for colored pencils.
Ordinary printer paper works for practice. Smooth paper around 90 to 120 gsm gives crisp lines and handles several light layers. Very rough paper leaves a grainy look, and very slick paper gives little grip. Our guide to the best paper for coloring pages explains how to choose, and our guide on how to print coloring pages helps you print sharp outlines.
Hold and sharpen your pencil
Hold the pencil farther from the tip when you want light pressure. Move closer for precise control near a small edge. Rotate the paper, not your hand, when you change stroke direction. Derwent gives the same advice in its guide to techniques.
Sharpen without breaking points
Sharpen new pencils before you use them, and keep your blade sharp. Hold the pencil upright, press lightly and turn the sharpener instead of the pencil. Standard school crank sharpeners can damage soft colored pencils, so choose a sharpener made for them. If one sharpener breaks several pencils, check its blade before you blame the pencils.
Control pressure with a five step ladder
Pressure is your most important skill. A simple ladder trains it. Draw five small boxes in a row and fill each one with the same pencil.
Box 1: the faintest tint you can see.
Box 2: a light, even layer.
Box 3: a medium layer.
Box 4: a firm layer.
Box 5: your strongest pressure, which you should rarely use.
Notice how the same pencil creates five different colors. Most coloring pages need only boxes 1 to 3 for most of the picture. Light pressure also protects the paper’s texture, so it keeps room for more layers. Sarah Renae Clark and other colorists warn that hard pressure flattens the paper and limits blending.
Practice useful pencil strokes
You do not need to master every drawing technique. These four cover most coloring page situations.
Stroke | How to make it | Where to try it |
|---|---|---|
Small overlapping circles | Move in tiny loops with light pressure | Even fills and soft transitions |
Hatching | Draw short lines beside one another | Visible texture and directional shading |
Cross hatching | Add another light set of lines at a different angle | Building depth without one heavy layer |
Contour strokes | Follow the curve or growth direction of the subject | Leaves, petals, fur and rounded forms |
Keep your first practice areas small. Overlap the edges of neighboring strokes, so you do not leave hard bands between them.
Layering, blending and burnishing
These three words sound technical, but each one has a simple meaning.
Layering means building color with several light coats. Derwent suggests laying the second layer at right angles to the first.
Blending means softening the change between colors. You can overlap light layers, or use a colorless blender or a light pencil.
Burnishing means pressing firmly in small circles to create a smooth, slightly shiny finish.
Derwent warns that after you burnish, it becomes very hard to add more color on top. So save burnishing for the last step. Read its advice in the Derwent techniques guide.
A word about solvents
Some artists blend with odorless mineral spirits. Even the odorless kind releases vapors, so work in a room with good air flow, and test first because some brands leave oily halos. For this beginner method, stay with dry pencils. You do not need solvents to learn controlled layering.
Plan your colors and light
Pick a light color, a middle color and a dark color from the same family. For a leaf, try yellow green, medium green and dark green. If you own only one green, build different values with repeated light layers.
Value means how light or dark a color looks. It creates depth, even when your palette is small. Choose one simple light direction, such as the upper left. Keep the highlight on the side that faces the light, and place deeper color on the opposite side or where shapes overlap.
Test your palette on spare paper, because a pencil barrel does not always match the mark on your sheet. Also save your brightest highlights before you fill an area. White added later may not bring back bare paper.
Color a leaf step by step
Choose a leaf about two or three fingers wide. A larger shape gives you room to see the layers.
Find the light area. Keep a narrow strip near the upper left side pale.
Add the base. Apply yellow green lightly across most of the leaf. Follow its curve with short strokes.
Build the middle color. Add medium green to the lower and right parts. Ease your pressure as you near the light area.
Deepen one shadow. Add dark green near the lower right edge, or where part of the leaf folds. Keep this area small.
Soften the transition. Overlap a light layer of medium green between the dark and light areas.
Add structure. Use a sharp point for a few veins, and let some lines fade.
Pause and look. You should see a light area, a middle area and a shadow. Add another layer only where it helps.
Now color a second leaf with the same colors but a different light direction. This teaches you more than darkening the first leaf until the paper stops accepting pigment.
Color a whole coloring page from start to finish
Print the page on suitable paper, and tape a backing sheet under your hand.
Test your palette on a spare sheet.
Color the smallest areas first, with sharp points and light pressure.
Work from light colors to dark colors, so dark pigment does not dirty light areas.
Fill large areas with the side of the point and overlapping strokes.
Add a second and third light layer where you want depth.
Add dark accents last.
Step back and look at the whole page before you burnish anything.
Work lightly near the printed outline. A heavy colored border can stay visible after you fill the shape.
Five practice exercises
Pressure ladder: five boxes from faint to firm.
Gradient bar: blend one color from light to dark across a rectangle.
Two color blend: overlap yellow and blue to make green.
Sphere shading: color a circle with a highlight, a middle tone and a shadow.
One page a day: finish a small corner of a page each day, and date your sample.
Pick one exercise per session. Keep your practice sheet next to your coloring page so you can compare progress later.
Fix common coloring problems
My color looks streaky
Check for heavy first strokes or a blunt point. Sharpen gently, reduce pressure and add a light overlapping layer. A slight change in stroke direction can fill gaps.
I can still see white specks
Some specks come from the paper’s texture. Add light layers with a sharp point before you try burnishing. If the surface already feels full and shiny, stop adding pressure. Try smoother paper next time, or keep the grain as part of the look.
A cloudy white film appears on dark areas
That film is wax bloom. Prismacolor’s FAQ describes it as a natural oxidation of wax based pencils that looks like a cloudy white film, and it suggests wiping it with a dry cloth. You can read the answer in the Prismacolor FAQ. Colorists also reduce bloom by using lighter layers, burnishing less and spraying a workable fixative. The film can return, so wipe it again if needed.
The paper will not take more color
You may have flattened much of its texture. More force can damage the sheet without adding useful pigment. Finish other areas, and use lighter first layers on your next page.
My colors look muddy
Too many overlapping colors can turn an area dull. Test a smaller palette, and keep dark accents limited. You can also place complementary colors side by side instead of layering them heavily in one spot.
I colored outside the line
Press a clean kneaded eraser on the mark, then lift. Do not rub hard. Test first, and accept that some pigment may stay. Sometimes you can turn a small mark into part of the background.
The pencil point keeps breaking
Use a sharpener that fits the barrel, press more lightly and protect pencils from drops. If one sharpener breaks several different pencils, check its blade and fit.
My hand feels tired
Relax your grip, rotate the page and take breaks. Many artists suggest a short rest about every twenty five minutes. Strong color should come from controlled layers, not from a painful grip. If pain continues, talk to a doctor.
Protect your finished page
Lightfastness tells you how well a pencil resists fading. Makers rate it in different ways, and results vary by brand. Faber Castell, for example, states that its Polychromos pencils carry a lightfast rating on each pencil. One independent colorist’s six month test found large differences between brands, so treat ratings as a guide and keep favorite pages out of direct sun.
For storage and display ideas, see what to do with finished coloring pages. Not sure which tool to buy next? Compare crayons, colored pencils and markers.
How we wrote this guide
We reviewed the top ranking beginner tutorials and filled gaps they leave, such as a pressure ladder, wax bloom, solvent safety and page by page workflow. We checked technique advice against Derwent, Prismacolor and Strathmore. Brands change their products, so read the current label. Last reviewed in October 2026.
Common questions
How do you color with colored pencils for beginners?
Start with light pressure and a sharp point. Build color in thin layers, work from light to dark and save dark accents for last. Practice on a small shape first.
How many layers should I use?
There is no fixed number. Pencil formula, paper texture, pressure and your finish all matter. Add thin layers until the area looks right, or until the paper stops accepting color comfortably.
What is burnishing in colored pencil?
Burnishing means pressing firmly over existing layers to create a smooth, slightly shiny finish. Do it last, because it makes adding more color difficult.
What is the difference between blending and burnishing?
Blending softens the change between colors, often with light layers or a colorless blender. Burnishing uses firm pressure to smooth and merge the surface.
Should I outline every shape first?
You can, but a heavy colored border can stay visible. For a soft result, work lightly near the printed outline and build the inside gradually.
Can you erase colored pencil?
A kneaded eraser can lift light layers. It rarely returns heavy color to bare paper, so plan your highlights early.
What is wax bloom?
Wax bloom is a cloudy white film that can appear on wax based pencil work. Wipe it with a dry cloth, and use lighter layers to reduce it.
Do I need expensive pencils?
No. Basic pencils can teach pressure, value and color choice. Better pencils may offer softer cores or stronger pigment, but practice matters more.
Can I add water to colored pencils?
Only pencils made for watercolor use respond as intended. Check the label, use suitable paper and test whether the printed outline resists water.
What paper is best for colored pencils?
Smooth printer paper works for practice. For many layers, try vellum Bristol for tooth or smooth Bristol for detail.