
Coloring Supplies
Crayons vs Colored Pencils vs Markers: What Should You Use?
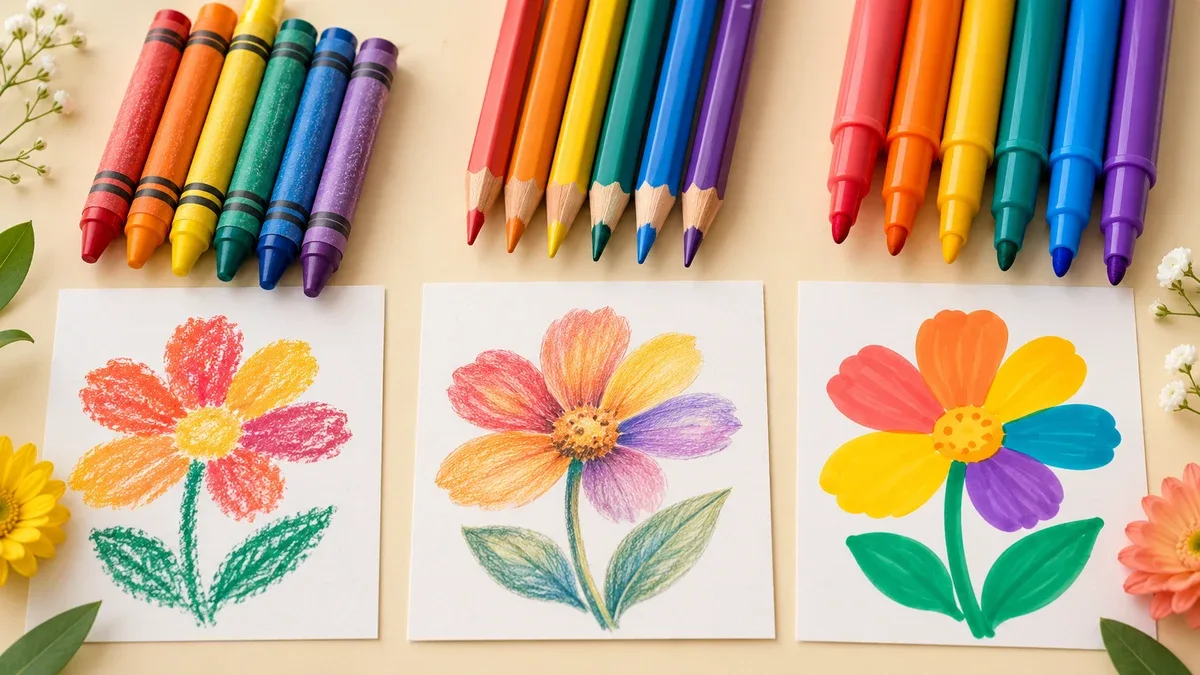
Which coloring tool should you pick? Crayons, colored pencils and markers all give great results, but each one shines in a different situation.
Quick answer: Choose crayons for easy coverage and visible texture. Choose colored pencils for control, shading and small details. Choose markers for bold color with a light touch. You can also combine them on one page.
This guide compares all three side by side. It also explains pencil types, marker safety, age fit, paper needs and budget, so you can choose with confidence. Last reviewed: October 2026.
Already know your tool? Jump to our guide on how to color with colored pencils, or browse the All Coloring Pages homepage for pages to try.
In this guide
Quick comparison
Feature | Crayons | Colored pencils | Markers |
|---|---|---|---|
Look | Textured wax color | Fine strokes and layered shading | Strong, flat ink color |
Best for | Big shapes and quick fun | Details and shading | Bold color and fast coverage |
Small spaces | Pointed tip helps | Sharp point gives control | Fine tip helps, but ink can spread |
Large spaces | Use the side of the crayon | Needs many strokes | Broad tip covers quickly |
Blending | Possible, but limited | Excellent with layers | Strong with alcohol markers |
Corrections | Wax resists removal | Light layers may lift | Most marks stay |
Mess | Crumbs and melting in heat | Shavings | Stains, bleed through and caps |
Paper demands | Modest | Texture affects layering | Absorbency and coatings matter |
Care | Keep away from heat | Sharpen and protect the cores | Close caps fully |
These patterns describe ordinary wax crayons, traditional colored pencils and common coloring markers. Gel crayons, watercolor pencils, paint markers and other specialty tools can behave differently.
Which tool should you pick?
Your situation | Best pick | Why |
|---|---|---|
Toddler or first time colorist | Jumbo crayons | Thick, easy to grip and no sharpening |
Young child who wants bright color | Washable markers | Bold results with light pressure |
Child who loves small details | Colored pencils | A sharp point gives control |
Adult who wants to relax | Colored pencils or crayons | Quiet, low mess and easy to pause |
Intricate mandala or pattern page | Fine pencils or fine tip markers | Small spaces need a small tip |
Big, bold characters | Markers or crayons | Large areas fill fast |
Classroom set | Crayons and washable markers | Durable, affordable and easy to clean |
Travel kit | Pencils and a small sharpener | No caps, no leaks and no melting |
Do you like options? Then use more than one tool. Many colorists fill big areas with markers or crayons and add details with pencils. We show how below.
When crayons work best
Crayons suit relaxed coloring, broad shapes and quick activities. They need no drying time, and you can use the side of the crayon to fill a background fast.
They also show texture clearly. A light layer leaves some paper visible, and firmer pressure leaves more wax. You can overlap colors, change pressure or make a simple rubbing on a suitable surface.
Crayon limits
Tiny spaces are the main limit. A worn tip covers more area than you want. Turn the crayon to a sharper edge, pick a larger design or switch tools for those details. Heavy wax can also block later layers, so test first if you plan to add fine pencil lines in the same area.
Crayons, gel crayons and oil pastels
People often mix these up. Wax crayons use wax as the binder. Oil pastels use a mixture of non drying oil and wax, which makes them softer and smudgier. Gel crayons feel creamier than standard crayons. Check the package before you buy, because oil pastels need different paper and care.
Choose crayons when you want a quick activity, broad coverage, tactile texture or supplies that need little care.
When colored pencils work best
Colored pencils suit detailed designs because a small point gives you control. They also let you build value slowly, from a pale tint to a deep shadow. Start with light pressure, then add another layer where you want more color.
Wax based, oil based and watercolor pencils
Every colored pencil contains both wax and oil, but the proportions change how it behaves. Prismacolor pencils are a soft, creamy wax based example. Faber Castell Polychromos pencils are an oil based example, and they feel harder and drier. Watercolor pencils contain a water soluble binder, so you can melt their color with a wet brush. Makers publish exact formulas rarely, so read the product description.
Pencil type | Feels like | Good for | Watch out for |
|---|---|---|---|
Wax based | Soft and creamy | Easy blending and rich color | Breaks more easily and can show wax bloom |
Oil based | Harder and drier | Fine detail and long points | Often costs more |
Watercolor | Dry like a pencil, wet like paint | Soft washes on suitable paper | Thin paper buckles when wet |
Pencil limits
The tradeoff is time. Filling a big background with a sharp tip feels slow, so use the side of the point, overlap light strokes or save pencils for the parts you enjoy. A pencil eraser can lift some pigment from light layers. However, it rarely returns heavy color to bare paper, so plan your highlights early.
Choose pencils when you enjoy small details, gradual shading, visible stroke texture or a compact kit without wet ink. Our guide on how to color with colored pencils walks you through it.
When markers work best
Markers give strong color without heavy pressure. They suit graphic designs, broad areas and people who like instant color. Tip shape matters. A broad or brush tip covers large areas, while a fine tip handles narrow spaces.
Water based markers
Many school markers use water as the main carrier. Some are washable, and Crayola’s Ultra Clean Washable Markers state that they wash easily from skin, walls and most washable clothing. Still, check the exact package, because washable claims differ between products. Repeated strokes can roughen thin paper, so avoid scrubbing one wet area.
Alcohol markers
Alcohol markers blend smoothly on compatible paper. However, they spread more and soak into the surface below. They also give off fumes. The safety data sheet for Copic markers says to use them only outdoors or in a well ventilated area, and it lists ethanol as a main ingredient. Read the sheet for your own marker in the Copic safety data sheet, and follow the maker’s directions.
Also test the printed outline. A marker may behave well on blank paper and still smear some printer inks.
Choose markers when you want bold coverage, prefer a lighter touch and can use suitable paper with a protected work surface. Our guide to the best paper for coloring pages explains how to stop bleed through.
Other tools worth knowing
Gel pens: great for sparkle and tiny accents, but they can smudge before they dry.
Brush pens: flexible tips for loose, expressive color.
Fineliners: crisp lines for patterns and outlines.
Watercolor pencils: dry color you can soften with water.
Safety labels explained
Art supply labels can confuse parents and teachers. The Art and Creative Materials Institute, or ACMI, runs a certification program with two common seals. The AP seal means a toxicologist evaluated the product and found it non injurious to humans when people use it as intended. ACMI says the AP seal suits children in sixth grade or younger. The CL seal covers products that can be hazardous without caution, and ACMI says they should never go to younger children.
Labels also follow the ASTM D4236 standard for chronic hazards, which supports the US Labeling of Hazardous Art Materials Act. You can read the details on the ACMI materials safety page. Always check the specific package for age guidance, because products in one category can carry different recommendations.
Choose by age, comfort and ability
Age alone cannot pick the right tool. Think about grip comfort, design size, session length and whether the person can handle caps or sharpening.
Toddlers: jumbo crayons are easy to grip and need no sharpening. Supervise closely, and follow the package age label.
Preschool and early school: washable markers and crayons give fast, happy results.
Early readers and writers: colored pencils build control and pencil grip as hands grow ready.
Adults: any tool works. Pick the effect you enjoy.
If a narrow pencil feels uncomfortable, try a different barrel shape or a wider grip. If pressing for dense color tires your hand, try lighter pencil layers or a suitable marker. Also match the page to the session. Large open shapes support quick fills, and tiny decorative details invite slower work.
For group activities, place a small selection of each tool beside a sample sheet. That way, nobody feels they must grow out of crayons. Adults enjoy them too.
Match the tool to the page
Page style | Try this | Reason |
|---|---|---|
Big simple shapes | Crayons or broad markers | Fast, bold fills |
Medium detail | Pencils, crayons or fine markers | Balanced control |
Tiny patterns and mandalas | Sharp pencils or fineliners | Small points reach tight corners |
Characters with big faces | Markers plus pencil details | Bold base, careful features |
Landscapes and shading | Colored pencils | Layers create depth |
Browse our free coloring pages and pick a few styles to test with each tool.
Combine tools on one page
Use each tool where it helps most. For example, color a broad sky with a marker and add pencil texture to a tree. Or use crayons for a playful background and pencil for small faces. To add pencil shading over a marker base, follow these steps.
Test both tools on the same paper.
Apply a light marker base without soaking the sheet.
Let the ink dry fully.
Add light pencil layers for texture or shadows.
Keep marker tips away from thick wax unless the maker supports that use. Wax can block the ink and dirty the tip. If a combination fails, check the order and the surface before you blame your technique.
Try a fair comparison
A small sample teaches you more than a big color chart. Draw three similar shapes on your real paper, and use one tool in each.
Fill a broad area to compare coverage and comfort.
Color a narrow section to compare edge control.
Make a light area next to a dark area to compare shading.
Overlap two colors to see how they mix.
Check the back and the backing sheet after any ink dries.
Then ask yourself which result you like and which process you want to repeat. Keep the test sheet with your supplies. It shows the real colors, because a barrel or cap may not match the mark on your paper.
Budget, cleanup and storage
Start with a modest set that covers the colors you use. More colors do not automatically improve a finished page. Think about replacements, a good sharpener and suitable paper before you buy a huge collection. Compare cost per color and cost per hour of coloring, not just the box price.
Pencils: use a sharpener that fits the barrel, and clear the shavings quickly.
Crayons: store them away from heat so they do not melt or snap.
Markers: close caps completely, and store them flat or as the maker advises.
Surfaces: protect the table even when a product says washable, and test unfamiliar surfaces first.
Finally, store finished sheets so wet ink cannot touch another page. Then see what to do with finished coloring pages for craft and display ideas.
Paper changes everything
Even the best tool disappoints on the wrong paper. Crayons and pencils work on ordinary printer paper, while markers often need a backing sheet or marker paper. If you print at home, our guide on how to print coloring pages helps you get crisp outlines first.
How we wrote this guide
We compared the top ranking guides on this topic and filled the gaps they leave, such as safety seals, pencil types and marker ventilation. We checked safety claims against ACMI, Crayola and a Copic safety data sheet. Product formulas and age labels change, so always read the current package. Last reviewed in October 2026.
Common questions
Are colored pencils or crayons better for kids?
Crayons suit toddlers and young children because they are chunky and need no sharpening. Colored pencils suit older children who want details and shading. Many families use both.
What is the best coloring tool for adults?
Colored pencils are the most popular choice for detailed pages. Fine tip markers and gel pens also work well. Pick the tool that matches the page and the effect you enjoy.
Are markers or colored pencils better for detailed pages?
Both work. Sharp colored pencils give the most control. Fine tip markers give bold color, but the ink can spread, so test your paper first.
Are washable markers really washable?
Many wash from skin and most washable fabrics, but results depend on the product, the surface and how long the ink sits. Read the package and test an unseen spot.
What does the AP seal mean on art supplies?
It means a toxicologist evaluated the product and found it non injurious to humans when people use it as intended. ACMI says the AP seal suits children in sixth grade or younger.
Do alcohol markers need ventilation?
Yes, follow the maker’s directions. The Copic safety data sheet says to use its markers outdoors or in a well ventilated area.
Can I blend crayons, colored pencils and markers?
You can blend colored pencils with layers, and alcohol markers blend smoothly on suitable paper. Crayons blend less. Test any combination on scrap paper first.
Which coloring tool makes the least mess?
Crayons and pencils avoid liquid ink, but they leave crumbs or shavings. Markers avoid sharpening, but they can stain surfaces. Choose the cleanup routine that fits your space.
What is the difference between wax and oil based colored pencils?
Wax based pencils feel soft and blend easily, but they can break and show wax bloom. Oil based pencils feel harder and hold a point longer.
What should a beginner buy first?
Buy one manageable set and paper that suits it. Color a sample page and notice what feels limiting. Then add another tool only when it solves that problem.